29 March 2015

Elephant Parade - Week 9 - Linky Party!

Welcome to week 9 of the Elephant Parade!  I have been showing a block each week and am so happy to see the works of those who have quilted along.  Some people have shared photos of their quilts by email.  And lots of you have been sharing your progress on instagram using the #elephantparadeQAL hashtag. Some have made a block or two.  Some have made pillows and some have made table runners.  Some have made the full quilt as is.  Some used their imagination to make the Elephant Parade their own!

The original post about the inspiration for this baby quilt design can be found here.  I have also added a Elephant Parade quilt along page that includes all the information you will need and a weekly schedule.  As each post was published the live links were added to the schedule.  The Elephant Parade page tab is found just below the blog header.

https://sewfreshquilts.blogspot.ca/2015/01/elephant-parade.html


Happily, Northcott Fabrics was as excited to see this come to life as I was, and has sponsored this project.  I am SO HAPPY to have had you follow along and watch as these bright solids from their ColorWorks Premium Solids quilting cottons collection were shaped into these adorable animals!

Although it was not necessary to purchase the pattern in order to participate, many people did.  And I really appreciate that, too, of course.  If you are wanting to make the complete quilt, as pictured above, and would prefer the convenience of using a printable pdf pattern,  Elephant Parade is available for purchase and includes complete cutting instructions and a detailed guide to finishing the entire quilt.  The pattern is available in my pattern store here.


We've been working hard on making our Elephants for 9 long weeks.
Through this experience, I have met some of the most wonderful, friendly and amazingly talented and creative people from all over the world.  Thank you, each of your for making this quilt along a success!!!!

NOW...
Today is the start of the Show Us Your Elephant Parade Linky Party!

Please link up your finishes here.  And then do visit some (or all!) of the other linkers and give them some Elephant Love!  It has been so much fun to work together on these projects!


Even if you don't have a finish to share yet, it will be fun to see what everyone else has to share.  And the linky party will be NEVER ENDING.  So you can link up whenever you are finished!


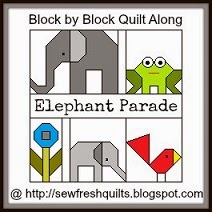
Join the Elephant Parade!

Sew Fresh Quilts


A quilt along button has been added to the right sidebar.  If you are interested in quilting along, please add the button to your blog and help to spread the word.  It's never to late to join in and quilt along!

Please feel free to share via social media!  And add the hashtag #elephantparadeqal

I have also added a page tab Elephant Parade under the blog header.  Here you will find all the details of the quilt along and a schedule.


Keep On Quilting On!


https://www.bloglovin.com/en/blog/5578781


To follow Sew Fresh Quilts by email....

Enter your email address:


Delivered by FeedBurner

27 March 2015

Zany ZebraZ quilt block tutorial

Today I am happy to share with you a tutorial for the Zany ZebraZ quilt block!

It is my hope that you will enjoy the use of this free tutorial for making these crazy zebra blocks.  Make one for a mini or a cushion or tote bag.  Or make a few and you have a cute baby quilt.


Completed block will measure 14.5" tall by 12.5" wide including seam allowances.
The finished size is 14" x 12".


To make each Zany ZebraZ block, you will need....


From black and white prints:

Body – 4.5” x 6.5”
Legs – 2pcs @ 1.5” x 4.5”
Head – 3.5” x 4.5”
Nose – 2.5” x 2.5”
Neck & Face – 1.5” x 2.5” and 3pcs @ 1.5” x 1.5”


From the black:
(1) 1.5” x 4.5” rectangle and (3) 1.5” squares

From the pink:
(2) 2.5” squares and (1) 1.5” x 2.5” rectangle

From the background fabric:
(2) 5.5” x 6.5” rectangles, (1) 3.5” x 5.5” rectangle & (1) 2.5” x 5.5” rectangle,
(1) 2.5” x 3.5” rectangle, (2) 1.5” x 3.5” rectangles, (1) 1.5” x 2.5” rectangle,
(2) 2.5” squares, and (7) 1.5” squares


Step 1:  To make the zebra body, take your 4.5” x 6.5” black and white print and 1.5” background fabric square.  Draw a diagonal line across the 1.5" background fabric square.  Place the background fabric square on the corner of the 4.5” x 6.5” black and white print body segment and sew along the diagonal line, as shown in red.  Trim a 1/4" seam.  Press seam open.


Step 2:  Take the 1.5" x 4.5" black rectangle and a 2.5" background fabric square.  Sew the 1.5” x 4.5” black rectangle onto the end of the body unit.  Then draw a diagonal line across the background fabric square.  Place the square on the corner of the black rectangle and sew along the diagonal line, as shown in red.  Trim a 1/4" seam.  Press the seam open.


Step 3:  To make the zebra legs, take your black and white print 1.5” x 4.5” rectangles and 1.5” black squares.  Sew the squares on the bottoms of the rectangles.  Press the seams open.


Step 4:  Take the 3.5” x 5.5” background fabric rectangle.  Sew the legs on each side of the rectangle.  Press the seams open.


Step 5:  Take the 2.5” x 5.5” background fabric rectangle and 1.5” black square.  Draw a diagonal line across the square.  Place a square on the corner of the background fabric rectangle and sew along the diagonal line, as shown in red.  Trim a 1/4" seam.  Press seams open.


Step 6:  Take the units made in the previous two steps and sew them together.


Step 7:  Take the units made in Step 2 & Step 6 and sew them together.


Step 8:  To make the zebra heads, take your black and white print  3.5” x 4.5” rectangle and 1.5” background fabric squares.  Draw a diagonal line across the squares.  Place the squares on the top corners of the black and white print rectangle.   Sew along the diagonal line, as shown in red.  Trim a 1/4" seam.  Press seams open.


Step 9:  Take the 1.5” x 3.5” background fabric rectangles.  Place the 1.5” black and white print square on the end of one of the 1.5” x 3.5” background fabric rectangles, with right sides together and sew along the diagonal line, as shown in red.  Trim a 1/4" seam.  Press seams open.  Sew this piece on the left side of the head.  Sew the other 1.5” x 3.5” background fabric rectangle on the right side of the head.


Step 10:  To make the zebra ears, take the 2.5" pink squares and 1.5" background fabric squares.  Place the 1.5” background fabric squares on opposing corners of the 2.5” pink squares and sew along the diagonal.  Trim and press open.  Take the 2.5” background fabric square and sew between the ears. 


Step 11:  Take the units made in the previous two steps and sew them together.  Press the seam open.  Add the 6.5” x 5.5” background fabric rectangle to the left side and press the seam open. 


Step 12:  To make the zebra neck, take the 1.5” x 2.5" background fabric rectangle and the 1.5” x 2.5” black and white print rectangle.  Draw a diagonal line across the 1.5” x 2.5" background fabric rectangle, place it on the top of the 1.5” x 2.5” black and white print rectangle and sew along the diagonal line, as shown by the red line.  Trim a 1/4" seam, as shown by the blue line.  Press the seam open.  Draw a diagonal line across the 1.5” x 1.5” black and white print square.  Place it on the black and white print portion of the unit and sew along the diagonal line, as shown in red.  Trim a 1/4" seam. Press the seam open. 


Step 13:  To make the zebra nose, take the 2.5" black and white square and 1.5" x 2.5” pink rectangle.  Sew them together and press the seam open.  Next place the 1.5” black and white square on the top corner of the 2.5” x 3.5” background fabric rectangle and sew along the diagonal.  Trim and press open.  Now add the neck unit made in the previous step.


Step 14:  Take the 6.5” x 5.5” background fabric rectangle and add it to the bottom of the unit made in the previous step.


Step 15:  Arrange your units made in Step 7 and 14.  Sew them together and press the seam open. 


Step 16:  Arrange your units made in Step 11 and 15.  Sew them together and press the seam open.  Sew or embroider the eyes and nostrils on the completed blocks.  I do not recommend using buttons on items intended for use by young children or babies.  Completed block will measure 14.5" tall by 12.5" wide including seam allowances.


This will remain as a free tutorial and a link to this post will be provided on my Tutorials page.  The Tutorials page tab can be found beneath the blog header.


Feel free to share a link to this tutorial on your blog or by social media.

And if you post a block or two...
Please use the #ZanyZebraZ hashtag so I can see your cute blocks!

I also invite you to add them to our Quilt Along with Sew Fresh Quilts flickr group here!


No go forth...
  And create your own unique herd of striped beasts!!!

Linking up for TGIFF hosted this week with Janet of Simply Pieced.


ENJOY!
Keep On Quilting On!


http://www.bloglovin.com/en/blog/5578781


To follow Sew Fresh Quilts by email....
Enter your email address:


Delivered by FeedBurner 

25 March 2015

Let's Bee Social #65

Welcome Friends!  It is once again Wednesday.
And time for the Let's Bee Social linky party!

After making Elephants and Zebras....
What comes next?

This week I have been working on writing up a pattern for Giraffe Love...

Giraffe Love baby quilt size 40" x 50"


Seems there are more than a few Giraffe lovers out there.  I have been getting quite a few requests.  Stay tuned for more wild news about this delightfully leafy animal baby quilt!


I also want to share some great news with you today....

I am now an official Ambassador for Island Batik!
And throughout the coming months I will be sharing projects made from their newest collections.  These are two new collections from their Spring/Summer lines that will be released at May Market and will be available to consumers beginning in August/September.


All I can show you right is a sneaky peek of this piled up goodness from Island Batik!

I am not normally a purple person...
But these shades of mauve with those cool blues are doing it for me!


In other news...


The FREE quilt along Elephant Parade final instructions for quilting and binding were posted on Sunday.
And next week the Linky Party opens!
It has been so much fun to see everyone's progress each week.  And all of the different ideas people have had for making this quilt uniquely their own.


And in case you missed it....

Don't forget to enter the Label GIVEAWAY!
The contest closes on Friday

Enter NOW for your chance to win!


NOW.... Let's PARTY!!!!
What's new with you?


If you are not sure what Let's Bee Social is all about, you can read the details here.


Keep On Quilting On!


http://www.bloglovin.com/en/blog/5578781


To follow Sew Fresh Quilts by email....

Enter your email address:


Delivered by FeedBurner 
Go Big Electric Fabric Cutter at Accuquilt.com Disclosure of Material Connection: Some of the links in my posts are “affiliate links.” This means if you click on the link and purchase the item, I will receive an affiliate commission. Regardless, I only recommend products or services I use personally and believe will add value to my readers. I am disclosing this in accordance with the Federal Trade Commission’s 16 CFR, Part 255: “Guides Concerning the Use of Endorsements and Testimonials in Advertising.”

22 March 2015

Elephant Parade - Week 8 - Quilting & Binding

Welcome to week 8 of the Elephant Parade!  I will be showing a block each week and would like to encourage you to quilt along.  You can try out as many or as few blocks as you like.  Make a quilt or make a mini.  Make a cushion.  Make whatever your imagination leads you to make!

The original post about the inspiration for this baby quilt design can be found here.  I have also added a Elephant Parade quilt along page that includes all the information you will need and a weekly schedule.  As each post is published the live links will be added to the schedule.  The Elephant Parade page tab is found just below the blog header.


Happily, Northcott Fabrics is as excited to see this come to life as I am, and will be sponsoring this project.  Follow along and watch as these bright solids from their ColorWorks Premium Solids quilting cottons collection become shaped into these adorable animals!

It is not necessary to purchase the pattern in order to participate.  But if you are wanting to make the complete quilt, as pictured above, and would prefer the convenience of using a printable pdf pattern,  Elephant Parade is available for purchase and includes complete cutting instructions and a detailed guide to finishing the entire quilt.  The pattern is available in my pattern store here.


Now that you have completed your quilt top and made your backing...
IT'S QUILTING TIME!


For the quilting on my Elephant Parade quilt, I referred to my recent post on Quilting With Your Walking Foot.  It was a toss up.  I had considered using the organic wavy lines for quilting.  And I also thought about using a different decorative stitch found on my machine.  I personally prefer a quick finish using an edge to edge design.  For this quilt, I used the Serpentine stitch.

I am so excited to share a few finishes made by some of the participants.  This may help you get some ideas for how to quilt your completed top.  Click on the photo or the link to their blogs for more details.


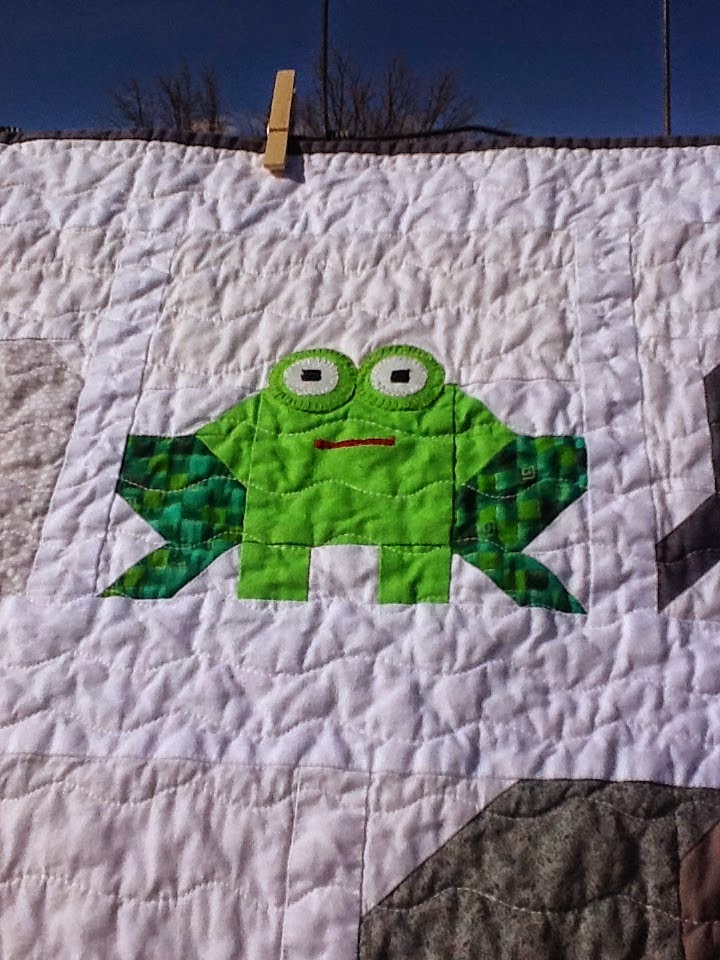
This cute froggy finish is by Tanya of Tanya Quilts in CO.
She also used the Serpentine stitch and you can see how lovely it looks fresh out of the wash, hanging on her clothesline!   Crinkly, quilty goodness there!!!
https://tanyaquiltsinco.blogspot.ca/2015/03/elephant-parade-finish-h2h.html


Marlies used her imagination and made a really cute table runner.  You just have to pop over and see the little yellow butterfly block she added to her parade!  She also used the Serpentine stitch.  Marlies blogs over at G'macht in Oberbayern.


Here we have a sweet pink finish by Carol of Just Let Me Quilt.
She added a double ruffle and some organic wavy lines to quilt it.  Doesn't that ruffle add just the right touch for making it so girly?  Sure does dress it up nicely!!!
https://www.justletmequilt.com/2015/03/the-elephants-are-coming.html


How about this smooth finish by Kris of Kris Loves Fabric?
She quilted in organic straight lines from edge to edge.  This quilting style reminds her of the lined school paper that she used to draw Ed Eberley animals on as a kid.


If you are more of a free motion quilter, perhaps you would like to outline the elephants and other characters and then do a swirly thing in the background.  I know there are a lot of free motion quilters out there who could make this quilt shine with their talents!

Here is a clever example by Maartje of Maartje Quilt in Amsterdam.
She used her imagination and came up with a free motion design that includes loops and elephant feet.  And she shares a tutorial for this motif on her blog!
Thank you for sharing, Maartje!!!
https://quiltinginamsterdam.blogspot.ca/2015/03/free-motion-quilting-elephant-footprint.html


Another example of finishing using a free motion quilting motif,  is this swirly loopy quilting design performed by Yvonne of Quilting Jetgirl.  Love it!
https://quiltingjetgirl.com/2015/03/20/elephant-parade-friday-finish/


I am looking forward to seeing all the different examples of how everyone chooses to quilt their own Elephant Parade quilts, runners or pillows!


On the Elephant Parade page, the cutting instructions state to cut 5 strips for binding.  I decided to shake things up a bit and opted to add little bits of the solids used in the quilt between each of my binding strips.  I called this method Little Bit Binding and included it in my Mastering Machine Binding post here.

To make the Little Bit Binding, make your binding strips as usual.  Also cut the same number of "little bits" from contrasting fabrics.  Please note that in the diagram below, I have made my "little bits" measuring 2.25" x 3.5".  The "little bits" each measure the same width of the binding strips and are 3.5" long.  If you use 2.5" wide binding, cut your "little bits" 2.5" x 3.5"

For my Elephant Parade quilt, I choose same fabrics used in the quilt top to make my little bits. 

Step 1:  Take your first little bit and your first full length binding strip.

Step 2:  Draw a diagonal line, as shown in purple, and sew to make a miter join.

Step 3:  Using your acrylic ruler and rotary cutter, trim a 1/4" seam.

Step 4:  Press the seam open and arrange your next little bit to be joined to the other end of that first strip.

Step 5:  Draw a diagonal seam line, as shown in purple, and sew to make a miter join.

Step 6:  Using your acrylic ruler and rotary cutter, trim a 1/4" seam.

Step 7:  Press the seam open.

Step 8:  Arrange your next full binding strip to be joined, draw a diagonal seam line, as shown in purple, and sew to make a miter join.  Use your acrylic ruler and rotary cutter to trim a 1/4" seam.

Step 9:  Press the seam open.  Arrange your next little bit to be joined, draw a diagonal seam line, as shown in purple, and sew to make a miter join.  Use your acrylic ruler and rotary cutter to trim a 1/4" seam.

Step 10:  Press the seam open.  Continue alternating your remaining full length binding strips and little bits.


When you have joined all your little bits and long binding strips together, press with wrong sides together along the entire length of the binding.  When you are ready to apply the binding to your finished quilt, begin using the end that has a little bit on it.  When you come to the end and are ready to join the tails of your binding, lay the last long binding strip, overlapping the beginning "little bit" 2.25", and trim the long binding strip.


I can hardly wait to see all your finished projects!
Please do check in next week to join the linky party!!!!!
Even if you don't have a finish to share yet, it will be fun to see what everyone else has to share.  And the linky party will be NEVER ENDING.  So you can link up whenever you are finished!


Join the Elephant Parade!


Sew Fresh Quilts


A quilt along button has been added to the right sidebar.  If you are interested in quilting along, please add the button to your blog and help to spread the word.  It's never to late to join in and quilt along!

Please feel free to share via social media!  And add the hashtag #elephantparadeqal

I have also added a page tab Elephant Parade under the blog header.  Here you will find all the details of the quilt along and a schedule.


Join us next week for the....
Never Ending Show Us Your Elephant Parade Linky Party!


Keep On Quilting On!


https://www.bloglovin.com/en/blog/5578781


To follow Sew Fresh Quilts by email....

Enter your email address:


Delivered by FeedBurner

Follow me Everywhere!

Follow on Bloglovin'

Follow by Email HERE...

To have new posts delivered to your inbox, enter your email address, and click on Sign Up! FeedBurner will send a confirmation message. Click the verify link within that message to start your subscription.

Visit my Pattern Shop...


Wholesale printed patterns?
Contact me at
sewfreshquilts@gmail.com


Join Our Sew Along on Facebook

Back to Top